Some thing about the DotNetNuke Module development.
Follow these steps....
Open the DotNetNuke installation in Visual Studio 2005.

Open the web site.
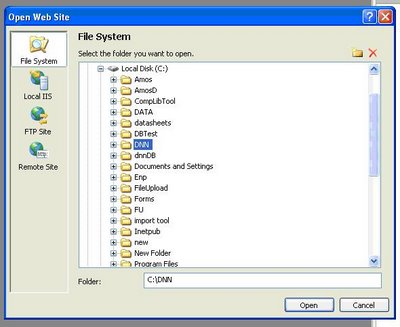
Right click on the root of the portal and click “Add New Item…”
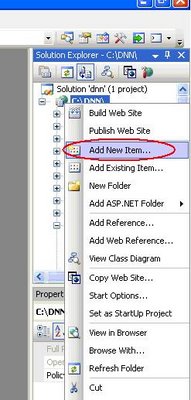
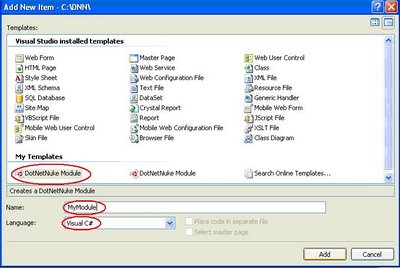
In the “Add New Item” Dialog box click “DotNetNuke Module under “My Templates” Choose a name and make sure you select “Visual C# as the “Language”. Click Add.
You will be presented with the following page.

Rename the folder “ModuleName” under the “App_Code” folder to “MyModule” and rename the Folder “ModuleName” under the “DesktopModules” folder to “MyModule”.
Add the < add directoryName=”MyModule” / > in the “web.config” file inside the < codeSudDirectories > tag.
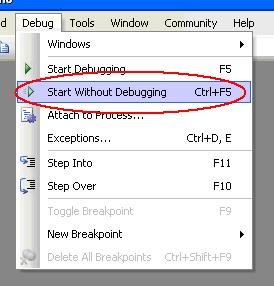
If you get any errors rectify them. One such common error is caused by the string concatenation. C# uses the “+” character to join strings. But you may get a error in the ViewMyModule.ascx (note: name of the file may change according to the module name) saying you to replace the “&” character with “+” character. Do it and start debugging once more, it should compile fine.
Log in the portal as a super user, usually the user name is “host” and the password is “ddnhost” bu default.
Go to the “Module Definitions” under the “Host” tab.
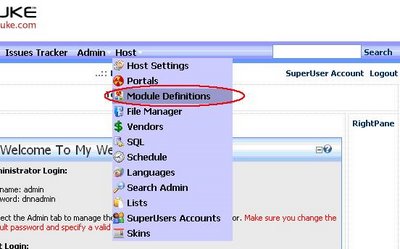
Click “Add new module definition” in the popup menu.
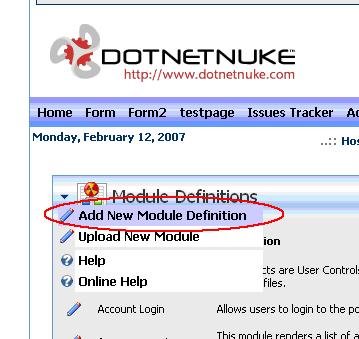
You are presented with the “Edit Module Definitions” screen.
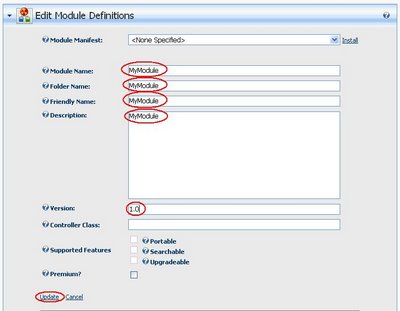
Specify the Module Name, Folder Name, Friendly Name, Description and Version. Click Update.
In the “New Definition” textbox type the module name and click the “Add Definition” link.
Click the “Add Control” link which appears at the end of the same page.
You are presented with the “Edit Module Control” screen.
Select the “DesktopModules/MyModule/ViewMyModule.ascx” as the “Source”.
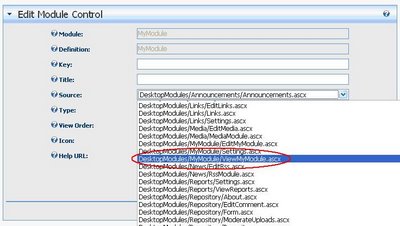
Select “View” for “Type”.
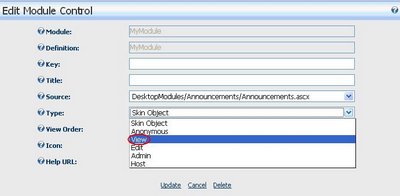
Click Update.
You will again be presented with the “Edit Module Definitions” screen. But now go to the “SQL” under the “Host” Tab.
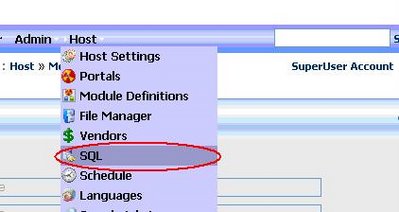
You will be presented with the “SQL” screen.
Now go to Visual Studio2005. Open the “01.00.00.SqlDataProvider” file and copy the entire code in it.
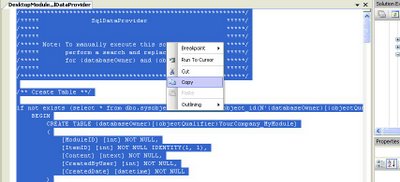
Paste the entire code in the text box provided on the SQL screen of the DNN Portal.
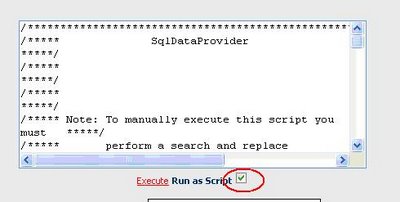
Check “Run as script” and click “Execute”.
Next nothing happens. But we have finished creating the module.
You can add the module on any page, just select the module name and click the “Add” link at the top of the page.
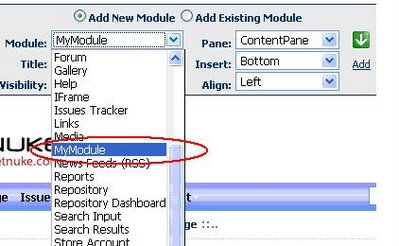
This will certainly present you with some errors. Go to the VS2005. Open the “ViewMyModule.ascx.”
Replace the inherits attribute of the control tag by
“Inherits="DesktopModules_MyModule_ViewMyModule"
Click Save.
Add a new Register tag after the existing one.
< %@ Register Assembly="DotNetNuke.WebUtility" Namespace="DotNetNuke.UI.Utilities" TagPrefix="cc1" % >
Remove all other things.
Your page should contain this and nothing else.
< %@ Control language="C#" Inherits="DesktopModules_MyModule_ViewMyModule" CodeFile="ViewMyModule.ascx.cs" AutoEventWireup="true"% >
< %@ Register TagPrefix="dnn" TagName="Audit" Src="~/controls/ModuleAuditControl.ascx" % >
< %@ Register Assembly="DotNetNuke.WebUtility" Namespace="DotNetNuke.UI.Utilities" TagPrefix="cc1" % >
Save it.
Open the “ViewMyModule.ascx.cs” file. Replace all the code after the “using” directives with
public partial class DesktopModules_MuModule_ViewMyModule : DotNetNuke.Entities.Modules.PortalModuleBase
{
public void Page_Load()
{
}
}
Save it.
Go to the Website or Portal. Click Refresh.

Your module should appear on the page. You can add any content on the “.ascx” file and place the code in the “.ascx.cs” file.
Note that these are “.ascx” files in stead of “aspx” files. Which means the the are user controls. You do not need to type in elementary tags like , ,
Now once you have successfully created or built the Module you can transport it to another DNN installation with the help of a Private Assembly. So we will also have a look a the procedure to create the private assembly.
Go to “Module Definitions” under “Host” tab.
Scroll down on the “Module Definitions” page. Click the Pencil like icon by the side of “MyModule”
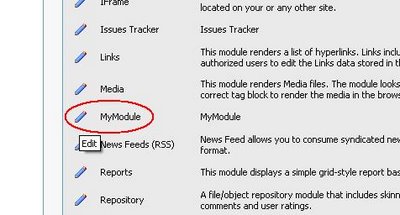
You will be presented with the “Edit Module Definitions” screen. Scroll down and click “Create Private Assembly” link.
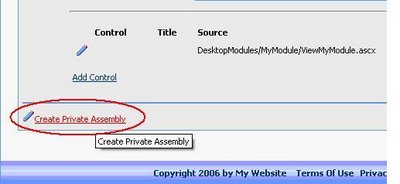
You will be presented with the “Create Private Assembly” screen.
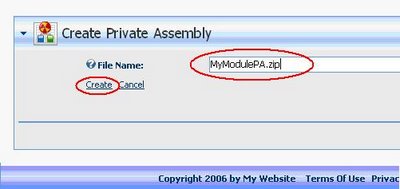
Specify a name say – “MyModulePA.zip” in the “File Name” text box.
Click “Create”. A message is displayed on the same page if all goes well.
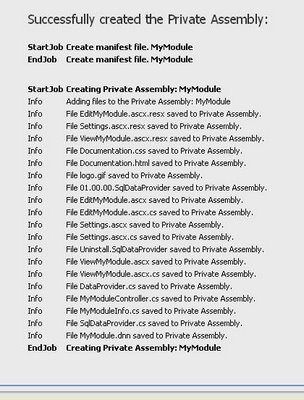
A zip file will be created in the ..\Portals\_default folder of your DNN installation.

This file is the Private Assembly. This file can be used to install the Module on any other DNN installation.
Now to upload the Private Assembly we just created, we follow the following steps.
Go to “Module Definitions” under “Host” tab. Scroll down and click “Upload New Module”

Specify the path of the .zip file for the module. Click “Upload New File”.

The same page displays a message if all goes well. Then the module can be used as usual on any page in that DNN installation.